By Lionel Gurret.
Thanks to the Openshift platform (OCP), thousands of companies allow their developers to build, deploy, and run applications in containers.
This platform also offers advanced features such as:
This platform can be hosted both on a private cloud (on-premise) and on a public cloud.
It is possible to install Openshift in two different ways:
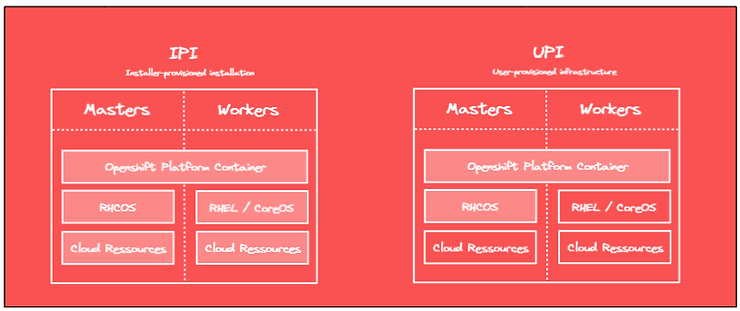
In this blog post, we will first detail the different steps related to the process of installing Openshift in a UPI context. Next, we will list the necessary prerequisites and associated configurations to install Openshift on AWS with Terraform (IaC). AWS public cloud specifics will be discussed.
The UPI installation will be based on ignitions files :
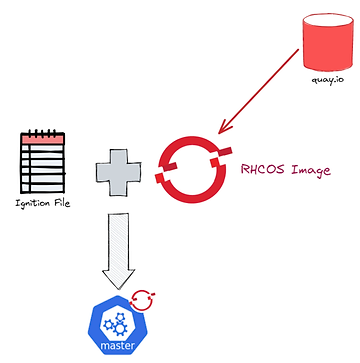
These ignitions files will be used by EC2 instances (master and worker nodes) to configure the RH CoreOS operating system at startup.
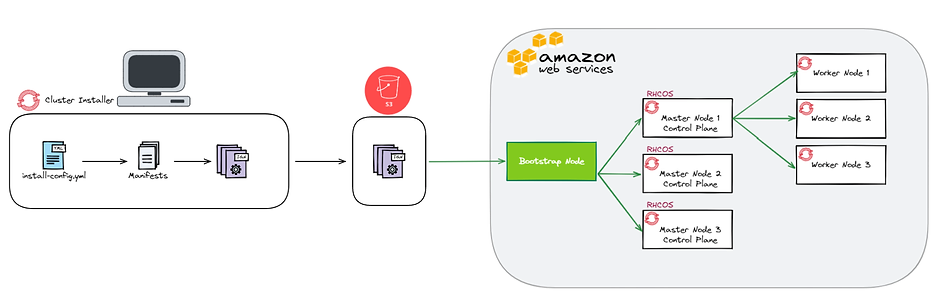
In order to generate these ignition files, it will be necessary to provide the OCP installer with the configuration of our cluster via an install-config.yaml file. The installer will then first generate the manifests and then the ignitions files.
We will host these files in an S3 bucket and our instances will use these files to perform their configurations. An additional instance of boostrap will also need to be provisioned to start the cluster installation and configuration process.
Indeed, it is not necessary to understand the process in detail to administer an Openshift cluster.
However, it can be useful in case you need to debug a problem during the installation.
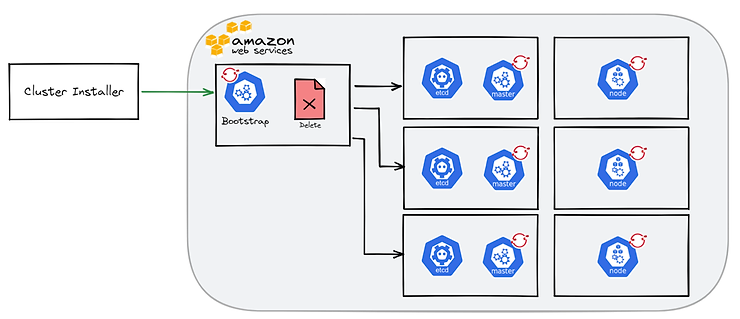
The process can be divided into 5 steps.
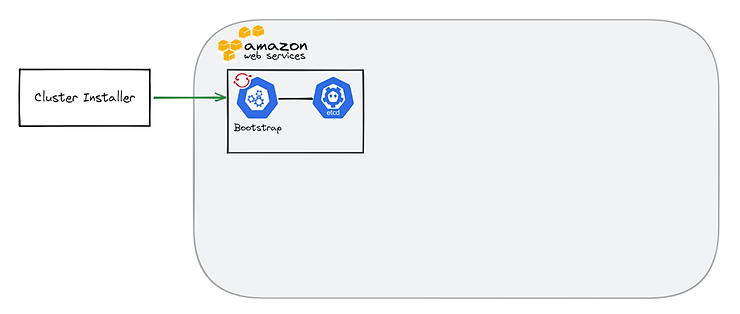
First, the ignition files generated by the OCP installer will be retrieved by the bootstrap machine. A dedicated DCE will be provisioned. It will be used in particular to store the configuration of the cluster.
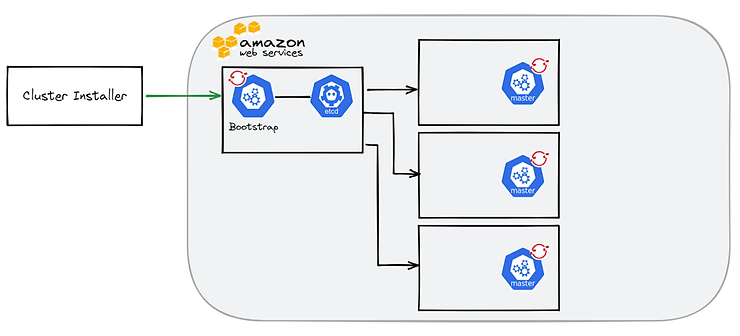
Then, the master nodes will recover their configurations and the boostrap machine will deploy a temporary control plane on port 22623.
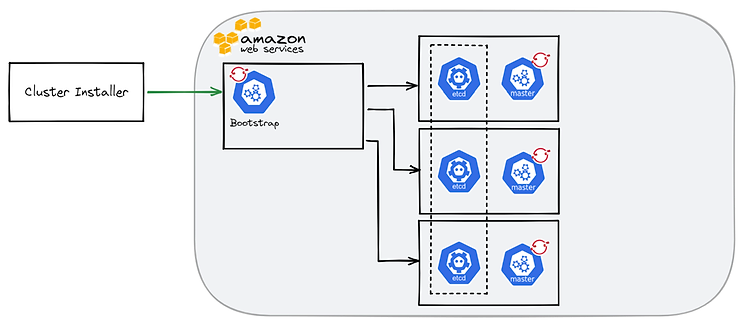
Through this temporary control plane, an ETCD cluster will be provisioned on the 3 master nodes and a production control plane will be accessible on port 6443.
From this point, the bootstrap server becomes useless and can be removed after the installation is complete. The deletion is automatic in the case of an IPI installation.
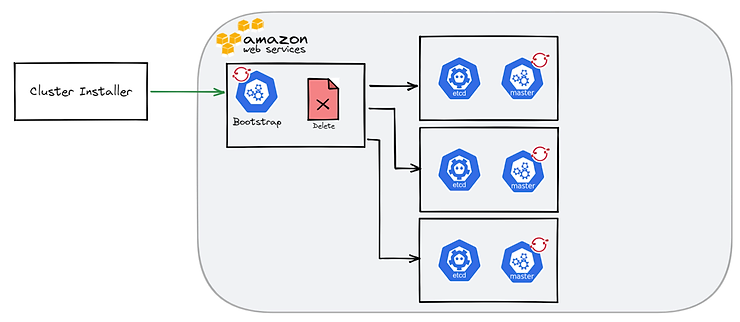
Finally, the worker nodes are configured and the OCP cluster installed.
Here, an example of a possible architecture for our OCP cluster on the AWS cloud.
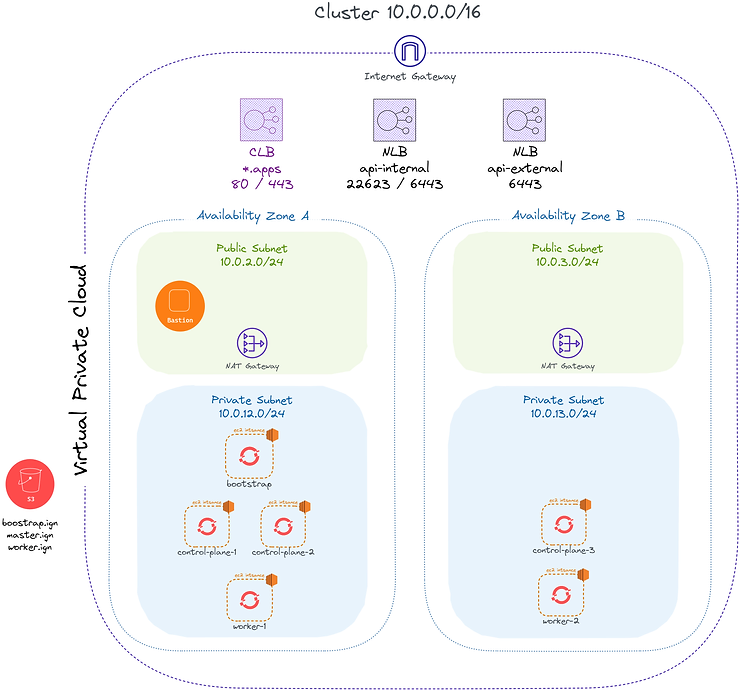
We can observe :
To provision these resources, the use of Terraformcan be judicious in order to remain in an IaC context.
It is interesting to first provision the AWS infrastructure with the exception of the cluster nodes. Second, our EC2 worker and master instances, once all DNS entries are provisioned.
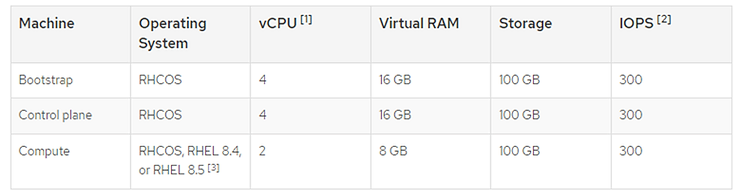
In order to provision our infrastructure, certain considerations must be taken into account.
To get started, the EC2 instance type must meet certain hardware requirements:
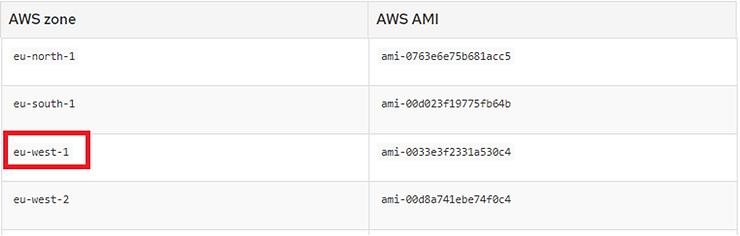
Next, it is important to note that AMIs are dependent on the AWS Region used:
Moreover, the following prerequisites will be required:
In order to launch the creation of the ignition files, the creation of the infrastructure and the OCP cluster, the following prerequisites will have to be met on your work environment:
On your laptop, create an install-config.yaml file in a specific folder (example: installation_dir) from the following template provided by the Openshift documentation:
apiVersion: v1
baseDomain: example.com
credentialsMode: Mint
controlPlane:
  hyperthreading: Enabled
  name: master
  platform:
    aws:
      zones:
      - us-west-2a
      - us-west-2b
      rootVolume:
        iops: 4000
        size: 500
        type: io1
      type: m5.xlarge
  replicas: 3
compute:
- hyperthreading: Enabled
  name: worker
  platform:
    aws:
      rootVolume:
        iops: 2000
        size: 500
        type: io1
      type: c5.4xlarge
      zones:
      - us-west-2c
  replicas: 3
metadata:
  name: test-cluster
networking:
  clusterNetwork:
  - cidr: 10.128.0.0/14
    hostPrefix: 23
  machineNetwork:
  - cidr: 10.0.0.0/16
  networkType: OpenShiftSDN
  serviceNetwork:
  - 172.30.0.0/16
platform:
  aws:
    region: us-west-2
    userTags:
      adminContact: jdoe
      costCenter: 7536
    amiID: ami-96c6f8f7
    serviceEndpoints:
      - name: ec2
        url: https://vpce-id.ec2.us-west-2.vpce.amazonaws.com
fips: false
sshKey: ssh-ed25519 AAAA...
pullSecret: '{"auths": ...}'
Modify and complete this file according to the desired configuration then run the command:
openshift-install create manifests --dir=installation_dir/You will find that your install-config.yml file has been replaced with Openshift manifests.
Then run the following command to create the ignitions files:
openshift-install ignition-configs --dir=installation_dir/Your installation folder should now contain the following files:
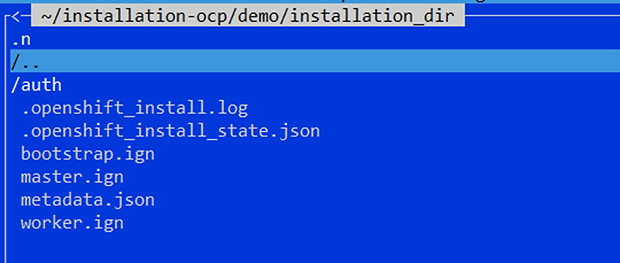
This metadata.json file contains important information for your infrastructure.
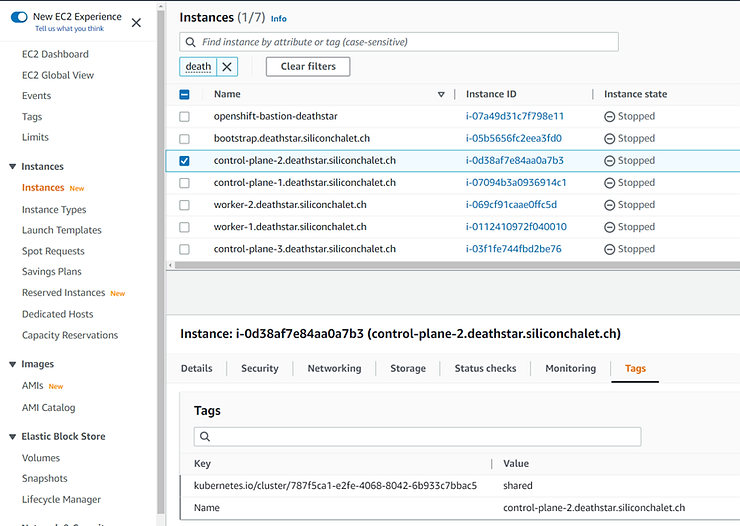
Indeed, the clusterID and the infraID must in particular be used to tag your resources for the smooth running of the installation.
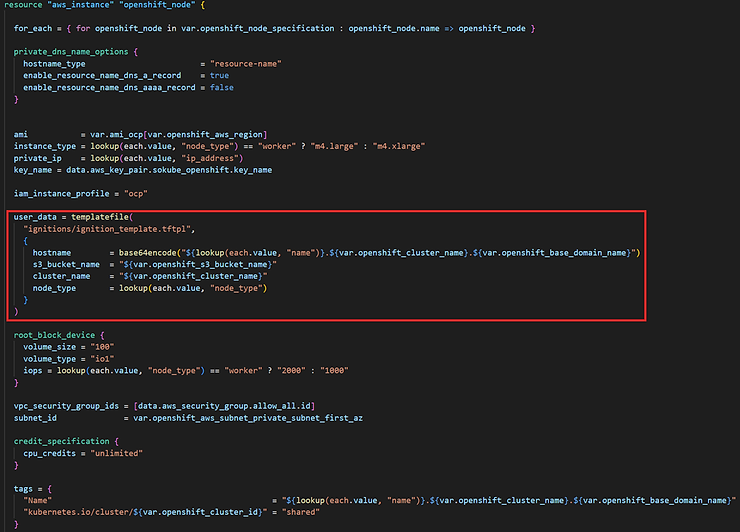
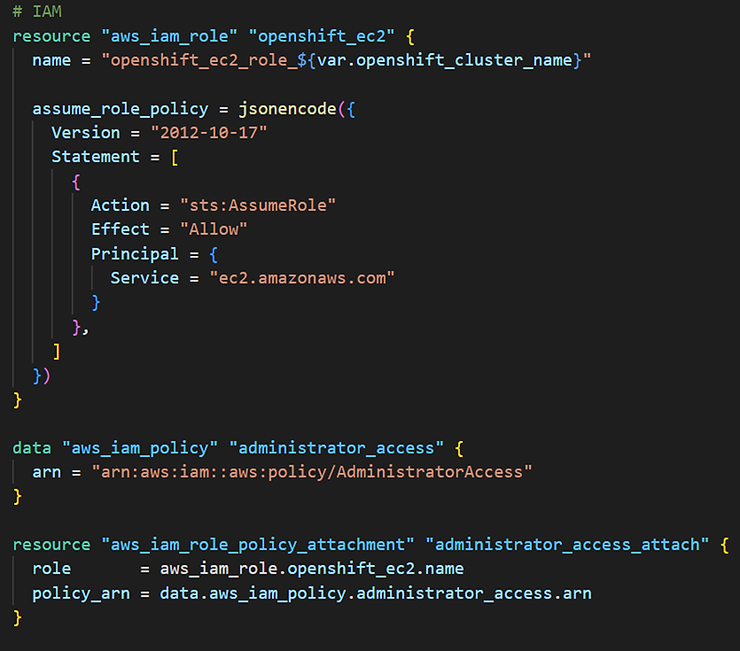
The Terraform code will not be covered in detail in this blog post but here are the main key points:


Once your ignitions files are hosted on the S3 bucket and your Terraform manifests have been prepared, you can start provisioning the infrastructure and then the cluster with Terrraform (terraform plan, terraform apply).
To follow the installation of your cluster, connect to the bastion server then to the bootstrap server and run the following command:
journalctl --unit=bootkube.serviceThis documentation will allow you to easily debug any possible problem.
Once the installation is complete, there are still two steps to access your cluster securely.
oc get csr -o go-template='{{range .items}}{{if not .status}}{{.metadata.name}}{{"n"}}{{end}}{{end}}' | xargs oc adm certificate approve
watch oc get nodesoc create configmap custom-ca
--from-file=ca-bundle.crt=/home/ec2-user/certificates/mycluster/mycluster.crt
-n openshift-config
oc get configmap custom-ca -n openshift-config -oyaml
oc create secret tls certificate
--cert=/home/ec2-user/certificates/mycluster/mycluster.crt
--key=/home/ec2-user/certificates/mycluster/mycluster.key
-n openshift-ingress
oc patch ingresscontroller.operator default
--type=merge -p
'{"spec":{"defaultCertificate": {"name": "certificate"}}}'
-n openshift-ingress-operator
watch oc -n openshift-ingress get podsYou should now be able to join your console and log in with the kubeadmin account!